Kitchen Sink Installation
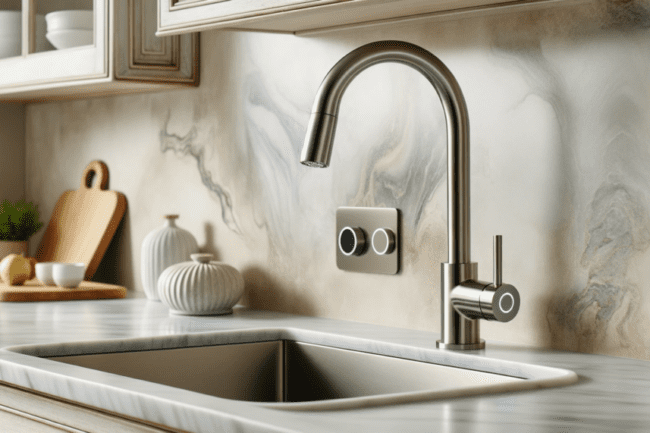
Kitchen Sink Installation in Toronto and GTA
Installing a new kitchen sink brings several benefits that go beyond just a fresh appearance.
First, it can make your kitchen more functional and efficient. Modern sinks often come with features like deeper basins and built-in accessories, which make kitchen tasks easier and more organized.
Second, they can be more environmentally friendly. Many newer sinks are designed to work well with low-flow faucets, helping to conserve water. This not only benefits the planet but also reduces your water bill.
Lastly, a new kitchen sink can be a key factor in increasing the overall value of your home, making it a wise investment for the future.
Signs That You Need a New Kitchen Sink Installation
Several indicators will inform you when you are ready to do a new kitchen sink installation. You should know that a kitchen sink replacement is not the solution to all kitchen sink problems. At times, all you need is a couple of fixes here and there, and you are good to go. However, you may need the kitchen sink replacement contractors when you see the following signs:
- The drainage process is slow even when trying remedies like drain cleaning agents.
- The drain line develops leakages, and a whole section of the line looks damaged.
- A foul smell comes from your kitchen, and it does not go away even when you do your best to remove it.
DIY Installation of Kitchen Sink vs. Professional Help
When planning to do a kitchen sink installation in Toronto, you are often confronted with two options. You either do it yourself and avoid a single kitchen sink installation cost or hire a professional plumber to do the job. DIY installations are usually an affordable choice. However, they require you to have some rich experience and skills if you are going to do a clean job.
Any mistakes like ill-fitted drains or a loosely fitted kitchen sink can cause problems like leakages, among others. However, if you choose the services of an experienced professional plumber, they ensure proper installations and connections between the drains. A professional plumber also ensures they let the sink sit evenly on your countertop and leave no gaps in between.
Kitchen Sink Installation Cost
The labor cost to install a kitchen sink and faucet usually varies considerably. That’s because it depends on the homeowner’s taste which often impacts the overall installation cost. A new kitchen sink can cost anywhere between $120 and $1500.
A new kitchen installation can cost from $300 to $800. However, that depends on the cost of labor required. Another factor determining the cost is whether the property is a house or a condo.
If you plan to relocate your kitchen sink or set up a double kitchen sink, then installing a new drain line increases the plumbing installation cost by almost one-third.
The installation costs are the same for farmhouse, undermount, or drop-in sink. The company puts your countertop that usually installs the undermount sink, though. After a day, the plumbers do a process similar to installation by hooking up your sink to the drain line and water.
However, if you would like to have a spray nozzle or garbage disposal attached to a new faucet or sink, you may need to factor in additional charges to the total.
Kitchen Sink Installation Prices from Cheap Plumber
Kitchen Sinks or Hook Up to Drains (ABS Black Piping) Installation from $395
Kitchen Sinks or Hook Up to Drains with Copper Piping Installation from $495
Kitchen Sinks with Gray XFR or PVC Piping Installation from $495
Contact Cheap Plumber Toronto for Professional Sink Installation Services
Proudly serving Toronto and its neighboring communities, including Mississauga, Markham, Aurora, East Gwillimbury, Etobicoke, King, Newmarket, Richmond Hill, Scarborough, and Vaughan, Cheap Plumber is your reliable choice for expert sink installation and replacement in Toronto and neighborhood!
To have sink renovations simply submit an online request or give us a call at +1 (416) 951 2777!
Benefits of Choosing Us for Your Drain and Plumbing Repairs

Fixed Prices, No Surprises
At Cheap Plumber, we show our prices up front, so you know exactly what to expect. You won’t find any hidden costs or unexpected bills here.

Always Available with 24/7 Service
Day or night, rain or shine, we're here for you. Our 24/7 service ensures that no matter when a plumbing issue strikes, we're just a call away.

Respect for Your Home
We know that your home is special. Our plumbers treat every house with the utmost respect, ensuring we leave it just as we found it.
Toronto Plumbing Service Area
We are glad to give you services in
different areas of Toronto, such as:
- York
- Etobicoke
- Scarborough
- Toronto
- North York
- East York
-
* All plumbing fixtures and faucets have to be supplied by owners. Price is correct through M-F 7.30 am-5.00 pm. Premium charges will apply for after hours, weekends and hollidays. Parking fee will apply if needed. Cost of the service calls is for the labor only. Price list for Toronto, Mississauga, Thornhill, Richmond Hill, Maple and Concord only.
Cheap Plumber in Toronto and GTA: fair price without adding any hidden costs
Book your drain and plumbing services right now
Related Services


from $495
Kitchen Sinks with Gray XFR or PVC Pipe Installation Toronto
A well-functioning kitchen starts with a reliable sink and drain

from $495
Kitchen Sinks Or Hook Up To Drains With Copper Piping Installation
Important aspects of your property like showers, baths, sinks, toilets,

Feedback on Cheap Plumber
Kevin
March 21th, 2025
Leak Detection Services
Cheap Plumber came through when we noticed a mysterious water stain on our basement ceiling. Their leak detection service was fast, accurate, and non-invasive. They quickly pinpointed the issue without tearing into walls and had it fixed the same day. Great service, fair pricing, and real peace of mind!
S. from North York
February 18th, 2025
Shut-off Valves Installation
I recently hired Cheap Plumber to install new shut-off valves for my kitchen and bathroom, and the experience was excellent from start to finish. Booking the appointment was easy, and the plumber arrived right on schedule. He explained what needed to be done, replaced the outdated valves efficiently, and even checked for any potential issues while he was there.
The work was done neatly with no mess left behind, and the pricing was exactly what they quoted—no surprises. I now feel much more confident knowing I can shut off water locally in case of an emergency. Highly recommend Cheap Plumber for this kind of work—fast, honest, and professional.
Martin L. from Toronto
September 25th, 2024
Old Cast Iron Pipes Descaling
We recently had Cheap Plumber come in for cast iron pipe descaling, and the difference has been incredible. Our drains were slow and noisy, and we were starting to get worried about a full blockage or worse. The team showed up right on time, walked us through the process, and got to work with minimal disruption.
They used special equipment to clear out years of buildup inside our old pipes—no digging or tearing things apart. By the time they finished, everything was flowing smoothly again. It was fast, clean, and surprisingly affordable. I highly recommend this service if you have an older home like ours. These guys really know what they’re doing!
Jeremie from Toronto
August 5th, 2024
Drain Line Repair (trenchless)
I had a serious issue with my main drain line and was dreading the idea of having my yard torn up for repairs. A friend recommended Cheap Plumber’s trenchless drain repair service, and I’m so glad I went with them. The team was punctual, professional, and explained exactly how the no-dig process worked. They were able to repair the damaged section of pipe without any excavation, and everything was completed in just one day. My drains are working perfectly now, and you’d never know there was a problem to begin with. Highly recommend!
Patrick from North York
March 5th, 2024
Drain and Plumbing Services for Rental Properties
I’ve been using Cheap Plumber for several years now for a couple of rental properties, and they’ve always delivered great service. They’ve handled everything from snaking drains to replacing a main drain with minimal disruption. Most recently, my parents had a backup, and Cheap Plumber was there the next day—quick, clean, and efficient. Their pricing is fair, and the whole team communicates clearly throughout the process. I’ll definitely continue to rely on them!
Natalie
January 12th, 2024
Snaking Service
I was dealing with a stubborn clog that just wouldn’t clear, so I decided to call in a snaking service—and I’m so glad I did! Plumbers showed up right on time, were highly professional, and took the time to clearly explain the process before getting to work. They were efficient, thorough, and made sure the blockage was completely cleared. My drains are flowing perfectly again!

Cooper
April 10th, 2023
Pipe In Powder Room and My Experience With CP
A few days ago the sink in the powder room started to leak. The pipe was corroded where the trap is located. I called Max and he sent Andres who replaced the pipe and left the powder room in perfect order. He was fast and efficient. I’ve used Max and his team for 10 years for major jobs replacing lead water lines in the front yard and installing a much-needed backwater valve under my house to prevent flooding during heavy rains. During a winter freeze, my pipes froze inside the wall and burst at midnight. Max’s team was here by breakfast and moved the vulnerable pipes from the exterior wall to inside the ceiling. Hardworking, decent, efficient crew.

LL
June 15th, 2023
Installation of Water Line
We have had a great experience with Cheap Plumber. They are reasonably priced, offer good advice, and do a quick and professional job. I would highly recommend them to anyone looking for plumbing services for their kitchen.

Lorraine
April 20th, 2023
Installed 2 New Faucets And Repaired Pipe In Garage
Very satisfied with the quality of work. Very nice gentleman. Punctual. Took the time to explain everything to me. Would highly recommend them to anyone. I will call them again if I need work done.

Valerie from Old Toronto
March 6th, 2022
New Faucet
We got a fast quote on email and a quick appointment slot for our small job. The two guys who came to do the job were efficient and pleasant. Exactly what we had hoped, a small job done well and quickly.

Ian Lee from Markham
October 25th, 2023
Replaced Horizontal Sewer Line In Basement In 100 Year Old House
I was renovating the basement of my 100-year-old house to replace the very old crumbling clay horizontal sewer line out to the street. I had several unsatisfactory quotes from other plumbers. I then contacted Cheap Plumber. Max was very reasonable and very efficient and timely. They also suggested a backwash valve that will prevent the sewer from ever backing up into the house. I agreed and they provided an excellent price and did a superb job. This week, I decided to install the Moen Flo valve (sold by Home Depot Canada and Amazon.ca) that shuts off all water to the house – IF ever there is a leak anywhere in the house in the toilet or water tank etc. I immediately contacted Max – who provided an excellent price and was able to install it shortly after the valve arrived. I was very pleased as no leaks and they cleaned up afterwards. I will use Max and Cheap Plumber for any future plumbing jobs. I strongly recommend this company.

Yuri
October 26th, 2023
Back Water Valve Installation
Max and his team installed a back water valve in my house, replaced some of the water lines, installed new water meter for me. Everything was done quickly, professionally, perfect clean up, filled out and submitted the forms for the rebate from the city. When I noticed a tiny leak after the job completion, a technician was sent over within minutes and everything was fixed very quickly. The services were reasonably priced, and I would definitely recommend this company to anyone with plumbing needs. Thank you!

Sylvie
December 24th, 2022
Shower Repair
Price was very reasonable, job was done correctly, water temperature issue was resolved. We had multiple people come in to the house before and did not fix the issue, Cheap Plumber was able to correct the situation. We are happy with the service and would definitely call again if we ever run into any issue.

Rudy from Toronto
May 8th, 2022
Drain Work
I had to get the water service line replaced because of the new smart water meter requirement. Got quotes on a monday. Went with Max and although I was a little concerned about the lack of reviews on Homestars, I went with my gut and my gut was right. The work was done by wednesday (in by 8:30 out by 3:30). Max and his guys were punctual, careful about maintaining site cleanliness and very respectful. His price was the best of three quotes and he is honest and straightforward in his communication. His follow up once the job was complete was great. I highly recommend Cheap Plumber for any plumbing issue you may have and I am happy with my new water pressure!

Caroline from North York
October 20th, 2023
Drain Work and Sump Pump Installation
I was one of six houses flooded on my street. All of us had plumbing work done, and I heard only good reports about the work and price.I wouldn’t hesitate to recommend Max to my friends, expecting they would get the same positive results.

Patricia from Scarborough
September 21th 2023
Cracked Soil Stack
Our 98 year old cast iron soil pipe needed replacing. Replacing it was tricky as we had a newly renovated kitchen and basement bathroom and the stack was embedded between the outside brick wall and the new tiles and cabinets. Max and his crew did an amazing job of replacing the stack with only minimal damage to the basement bathroom and none to the kitchen. He then had a crew come in to restore the wall, tiles, etc in the basement. The team is hardworking, trustworthy, and professional. This is the second job they have done for us and both times we were more than satisfied. Ps. They are also just really nice people. Worth every penny.

Yulia
September 13th 2023
Drain Work and Sump Pump Installation
Andrew did a great job fixing our drain. He was punctual, polite, knowledgeable and very patient with my questions. He quickly identified the problem (tree roots in drain pipe) and worked hard on snaking the tough roots until he was satisfied everything was clear. We were so lucky to have his help. Thanks Max and Andrew!